
- Sun 11 December 2022
- Blog
Introduction
It was a thrilling experience for me as a young boy to learn how to program using BASIC on an Apple IIe in the mid 90s. I remember spending hours sitting in front of the computer, staring at the green text on the black screen and typing in lines of code. I was always amazed by how I could create simple programs that would allow me to do things like play games, solve math problems, or even create graphics and animations.
I've always had an affinity for such simple 8-bit computers and more recently I begin exploring and experimenting with the ZX81/TS1000. The TS1000 is an interesting machine to program for. As per the period it has it's own BASIC implementation which is quite capable but slower than most due to the system's cost-reduced design. Thus, to write software for the system that's performant as possible it's necessary use assembly language or machine code.
There's plenty of examples out there of how to assemble a program for the TS1000 using modern tools like VS Code and TASM, but I want a more authentic experience where I'm actually writing assembly and assembling on the system itself. There's a few assemblers that were created for the TS1000 back in the day, but the one I'm going to focus on is ZX Assembler by Artic Computing.
The Assembler
ZX Assembler is a fairly robust assembler for the TS1000 and has basic text navigation features, support for labels, and a monitor for inspecting memory as well as registers/flags. This assembler is loaded from cassette and occupies around 7K or memory, which is fairly significant amount of memory if you have the standard 16K RAM expansion.
Playing around with this version I noticed you'll occasionally get instances where the assembler will crash or memory gets into a bad state.
Eventually I happened to find out that a gentleman named Carlo Delhez had later revised this assembler and released it as ZX Assembler 2. Fixed in this version are many of the crashing issues and there are also some syntax updates. After playing around with this version for a fair bit of time I can say it's very robust and a pleasant experience to work with. This version can be found here.
Even better, with ZX Assembler 2 you are no longer restricted to loading it in via cassette and eating up space in your precious 16K - 32K area. Included with the assembler are versions that can be burned to an EPROM (or EEPROM) and mapped to the 8K - 16K area which by default is just a shadow of the BASIC ROM. This does still require lowering the RAMTOP for space that it needs for variables though. There's also a version that assumes the 8K - 16K is RAM and thus negates the need for lowering the RAMTOP.
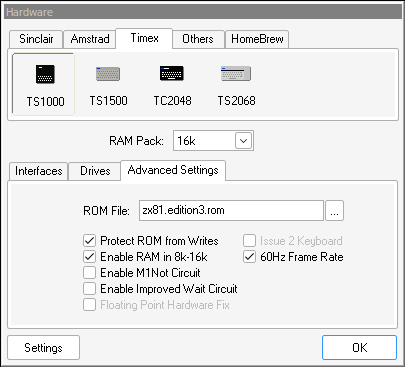
You can try this out using the EightyOne emulator. Adjust your hardware settings as follows.
- Set the RAM Pack to 16K
- Enable RAM in 8K - 16K
Once that's set, go to File and select Load Memory Block. Select the ZXA2-8K.C and load it at address 8192.
After that type the following the command and you should be presented with the assembler screen.
RAND USR 8192
Basic Instructions
Most of what's written in the manual for the original ZX Assembler still applies but I'll quickly provide a crash course here. The manual is available here.
Main Prompt
A- Assemble the current sourceE- Open the editorI- Display registers/flagsM- Open the machine code monitor
The Q key backs out of commands. Pressing it twice at the main screen will exit back to BASIC.
Editor
Shift + 6- Cursor downShift + 7- Cursor upShift + 8- Cursor rightShift + 5- Cursor leftShift + 0- BackspaceShift + 9- Insert a characterShift + A- Enter a labelShift + D- Delete lineShift + E- Insert lineShift + Q- Quit search, line, or editorShift + T- Move to top of sourceShift + S- Search forward for text,Shift + Awill search for a label
Monitor
O- Cursor upL- Cursor down
Directives
The original assembler allows for implicit strings and bytes to be entered. Version 2 requires you to explicitly denote these using DB and DW. Directives DM (defining a byte string) and DS (reserving n bytes of space) have also been added.
The labels in this example are arbitrary.
; Define bytes
NUMS   DB 0A,1F,FF

; Define words
ADDRS  DW 0010,80CA

; Define byte string
TEXT   DM "HELLO"

; Allocate space for variable
HP     DS 1
Constants
Constants are assigned in the format NAME=VALUE. There must not be any spaces around the = sign.
LASTK=4025
Hello World
This example program will print the text Hello World at the top left corner of the screen.
; Constant
DFILE=400C

       JR START

; Defining data
TEXT   DB 11
       DM "HELLO WORLD"

; Label
START  LD DE,(DFILE)
       INC DE
       LD BC,(TEXT)
       LD B,0
       LD HL,TEXT+1
       LDIR